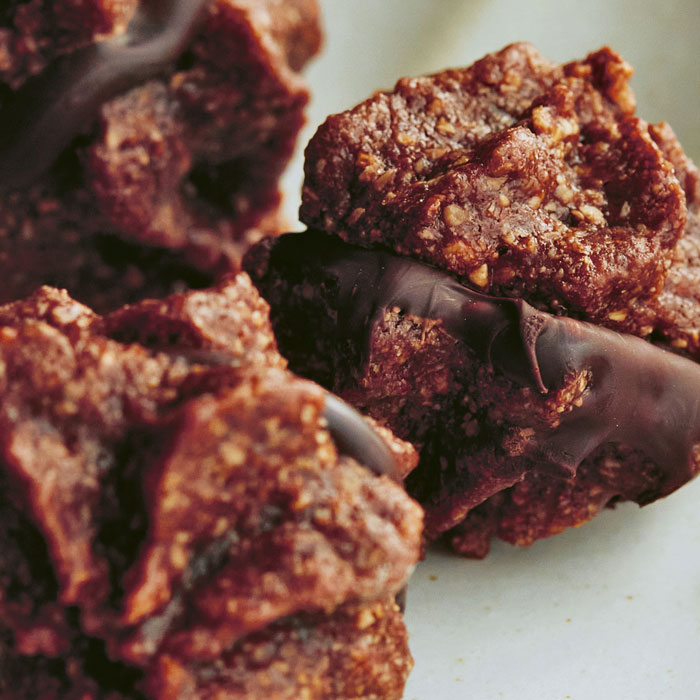
baci di alassio by giuseppe dell'anno

Recipes

Baci di Alassio

Alassio’s Kisses

You will fall in love with the chewy texture and the nutty flavour of these Ligurian treats

Ingredients

Introduction

Ingredients

For the biscuits

  • 130g (4¾oz/1 cup) blanched hazelnuts
  • 100g (3½oz/generous ½ cup) caster (superfine) sugar
  • 20g (¾oz/generous 1 tbsp) unsweetened cocoa powder
  • ¼ tsp ground cinnamon
  • pinch of salt
  • 35g (1¼oz) egg white (about 1 medium egg white)
  • 1 tsp vanilla bean paste
  • 25g (1oz/scant 2 tbsp) clear honey


For the filling

  • 70g (2½oz) dark chocolate chips or bar (50–55% cocoa solids)

Enjoyed this recipe?

Browse more of my delicious recipes

Introduction

These sandwich biscuits are named after Alassio: a beautiful Ligurian town and renowned holiday destination, where they were invented in the early 20th century, allegedly to create a sweet souvenir that the many tourists could bring back home and remember the place by.

These little treats are more than simple biscuits: they are flavoursome, chocolatey and indulgent little pastries made with a generous helping of roasted hazelnuts and cocoa powder. They are delicious on their own but are the perfect match for a cup of hot chocolate. They are naturally gluten-free and, as long as the chocolate is, also dairy-free. The texture is satisfyingly chewy, but they must not be overbaked as they may become very hard very quickly. Some bakers advocate a 12-hour rest of the piped dough in the fridge before baking to create a drier and crispier shell. However, my dad has always used the straight-in-the-oven approach and it has never failed him: I have tested both methods and quite frankly I cannot justify to myself the hassle of having to find the fridge space to chill 2 trays of biscuits overnight…

The trickiest step in the process is undoubtedly piping the stiff dough, so make sure that you equip yourself with a durable piping bag, a wide enough star nozzle and… a pair of strong hands. Resist the temptation to add extra egg white to loosen the dough as this will result in flat pancakes rather than neatly shaped biscuits. If piping really does not do it for you, then wet your hands and mould the dough into small balls instead!

Instructions

Make the biscuits

  1. Place the shelf in the middle of the oven and preheat it to 180°C fan (400°F/Gas mark 6).
  2. When the oven reaches the set temperature, place the hazelnuts in a baking tray and roast for 8 minutes until just about golden. Give the hazelnuts a shake midway through the process to ensure an even bake. Take the hazelnuts out of the oven, let them cool for a few minutes, then chill them in the fridge.
  3. Meanwhile, change the oven setting to 180°C static (350°F/Gas mark 4).
  4. Once the hazelnuts have cooled down completely, place them in the bowl of a food processor, add the sugar and pulse the mixture a few times until fine and sandy. If your food processor does not have a pulse function, blitz on maximum speed for no more than 10–15 seconds. Avoid over-processing the nuts as they might overheat and leach out oil. Any grittiness due to slightly larger granules of nuts will not be a problem, in fact, it will add to the texture of the biscuits.
  5. Transfer the nuts and sugar mixture to a medium bowl, sift in the cocoa, cinnamon and salt, and mix with a spoon until fully combined and lump-free. Make a well in the centre and add the egg white and vanilla. Incorporate them into the dry ingredients with a spoon to make a stiff paste. Once homogeneous, add the honey and combine. The sugar takes a while to dissolve in the liquid ingredients, so stir and fold the mixture for a couple of minutes longer than you think it is needed; this will also soften it a little and it will make piping it easier.
  6. Transfer the paste into a piping bag with a 12mm (½in) star nozzle.
  7. Piping the biscuit is probably the hardest step in the process as the mixture is rather stiff. Single-use or silicone piping bags are unsuitable: you should use proper canvas or nylon piping bags for this mixture, or you risk a rupture. For the same reason, if in doubt, use a larger nozzle as a smaller one will make your life more difficult. Line 2 baking sheets with baking paper and pipe the paste to form 3–4cm (1¼ –1½in) wide dollops, about 3cm (1¼in) apart. You should be able to fit 18–20 biscuits on each tray. Resting the biscuits in the fridge for 12 hours at this stage will develop a slightly crunchier crust, so if you have the time and the space in the fridge, go for it, otherwise move to the next step straightway.
  8. Bake one tray at a time for no longer than 9–10 minutes. Given the dark colour of the dough, it is pretty difficult to gauge when the biscuits are ready, however, given the size, 10 minutes should be more than enough. If in doubt, take them out a minute earlier rather than later: overbaking will make these biscuits tough and unpleasant. Take the biscuits out of the oven and slide the baking paper on to a cooling rack immediately. They will be still soft, so give them a few minutes to cool before taking them off the baking paper.


Assemble

  1. If you are using a chocolate bar, chop it finely with a sharp knife. Place the chopped chocolate or the chocolate chips in a small microwave-safe bowl and microwave it for 30 seconds. Take it out and stir the chocolate with a silicone spatula for about 20 seconds to distribute the heat evenly. If there are still bits of solid chocolate, give it bursts of 10 seconds in the microwave, followed by 20 seconds of stirring, until all the chocolate is melted. Let the chocolate rest at room temperature for a few minutes to stiffen up. To check if it is ready, scoop a small amount with the spatula and let it fall back into the bowl: the chocolate is ready when it forms a blob that holds its shape without flowing back into the rest of the chocolate.
  2. While the chocolate stiffens up, arrange half of the biscuits upside down on the cooling rack.
  3. When the chocolate is ready, transfer it to a small piping bag with a 3–4mm (1/8in) opening (no nozzle required) and pipe about ½ teaspoon of chocolate on each biscuit. You can also simply spoon dollops of chocolate on to the biscuits using 2 teaspoons. Pair each filled biscuit with its empty counterpart, slightly pressing them together, and place them back on the cooling rack to set. Work quickly or the chocolate will set; I would recommend filling a few biscuits, then pairing them immediately rather than filling the whole batch first. Make sure the chocolate has hardened fully before taking the biscuits off the cooling rack. Store in an airtight container for up to a week.

Enjoyed this recipe?

Browse more of my delicious recipes